How to Choose the Right Development Board for Your IoT Project
A list based on my own experience, beyond the obvious considerations.

This post is about development boards. More specifically, how do you choose which development board to use?
Development boards for IoT are small, programmable hardware platforms that let you prototype and build connected devices by integrating sensors, actuators, and wireless communication.
Electronics was not my background. Back in the days, when I first got into electronics, I was in survival mode: getting a LED to blink when my I2C sensor hit a value, was already a major win. I never really thought about the differences between development boards. I knew there were differences—obviously— but it all felt a bit too technical to fully grasp.
As my projects grew in size and complexity, it was inevitable that some boards would start to hold me up. I began exploring other boards, making different choices. At first, the choices weren't deliberate. I gravitated towards what I knew, and added 10% outside of my comfort zone. Every board came with a solution, and every solution introduced a new set of unforeseen challenges. With each challenge, my understanding deepened, and so did my confidence.
Then, on a sunny day, my colleague and I were deep into a Raspberry Pi Pico project. We hit a rock. Pico just wasn't going to work out. We had to switch to a different board. After a quick search on the Internet I found one. I ordered it, solved the new set of challenges and presented a working version of our project. This was the moment my partner in crime asked me the question:
"How do you actually choose which development board to use?"
"I don't know," I said. "I somehow do it."
Right after saying that, I found myself listing reasons for choosing board A over B. That question - and my instinctive answer - made me realize: I do know how I choose my boards. I do have a system.
My considerations when choosing a development board
I present to you my list of practical features when it comes to choosing development boards. The list is based on my own experience. Features beyond the obvious basics like memory, CPU performance, and power requirements.
- C vs MicroPython
- Pinout: ADC, I2C, power supply:
- Battery support
- Documentation
- Onboard programmable LEDs
- Mounting holes
- Ability to power down power supply pins
- Onboard RTC (Real-Time-Clock)
C vs MicroPython
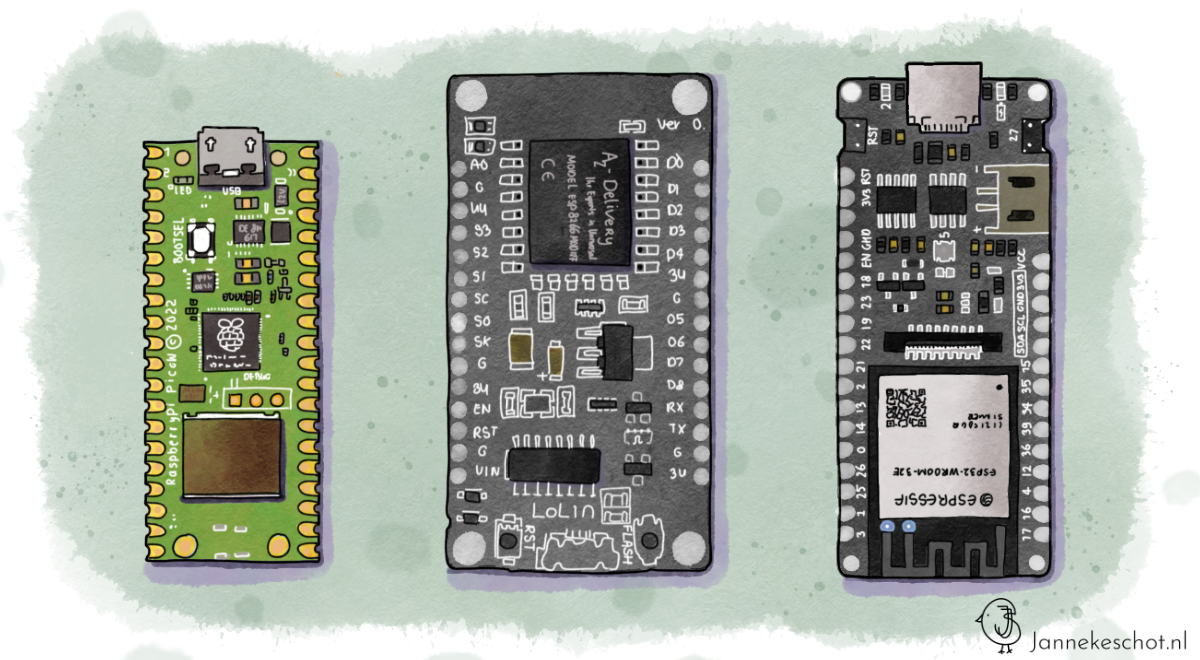
I prefer working with Python, as it’s the language I’m most comfortable with. However, if a sensor or breakout board I plan to use has better documentation, libraries, and community support in C, I’ll choose C over MicroPython. In practice, this often leads me to use an ESP32 board, which is well-supported in C/C++, rather than a Raspberry Pi Pico. While the Pico can be programmed in C as well, it requires more setup—and if I already have other boards that fit the job more easily, there's no reason to complicate things.
Anolog-to-Digital-Converter (ADC) pins
When comparing different boards, you might think, “Great—plenty of pins to connect all my sensors and modules!” But in practice, I’ve noticed some important differences in how those pins are actually laid out. Not all boards expose the same set of functionality, and some limit access to certain interfaces like I2C, SPI, or analog inputs. So it’s worth looking closely at the pinout diagram before choosing a board, especially if you have specific hardware in mind.
For example, the NodeMCU ESP8266 only has a single pin for reading analog signals, known as an Analog-to-Digital Converter (ADC). This quickly became a limitation in one of my projects where I needed two ADC inputs. I ended up switching to a different board, since ADC functionality is tied to specific physical pins—you can’t simply remap other pins to act as ADCs. It’s a hardware constraint. An alternative solution would be to use a similar sensor that communicates over a different protocol, like I2C or SPI, instead of relying on analog input. However, choosing a different board gave me more flexibility in the future compared to a new sensor.
I2C pins
It’s also important to consider the number of available I2C pins. Some boards expose only a single set of SDA and SCL pins, while others offer multiple sets. My advice: always look for a board that supports multiple I2C buses accessible through pins. Even if your current project does not require it, your future project will.
While it's technically possible to connect multiple devices to a single I2C bus—since the protocol supports multiple addresses—you’ll need to split the wiring, which can get messy on a breadboard. A cleaner approach is to assign additional I2C buses to alternate SDA and SCL pins in your code. This way, you can connect multiple modules directly to the board without relying on a physical fork of the wiring.
Be sure to check whether the I2C pins are actually broken out to physical headers. For instance, the LilyGo T3 S3, which uses the ESP32 chip, does support I2C—but the default I2C bus is already used by the onboard LCD display. Due to a slight design oversight, one of the I2C pins aren’t exposed for external use. Although It is possible to remap a new I2C bus on other available pins, I wouldn’t recommend this for beginners. There are already plenty of challenges to tackle early on, and debugging custom I2C setups can quickly become frustrating.
Power supply pins
Power supply pins are another important factor to consider. Many boards only provide 3.3v power output, which is sufficient for the majority of projects. However, some sensors and modules require 5V to operate properly. If you plan to use any of those, make sure to choose a board that supports 5V power output. Or be prepared to add a separate voltage regulator. Also, if you plan to connect multiple modules, I recommend looking for a board with multiple power output pins to simplify wiring. The Raspberry Pi Pico for example.
Battery support
Recently, I started developing projects that run off the grid—using sensors and modules in outdoor environments where there’s no access to electricity. In the beginning, I had extension cords running through open windows just to power everything. Now, I use batteries and solar panels instead.
Illustrations by Janneke Schot
If you're heading in the same direction, make sure to check whether your board supports battery power. Technically, almost all boards can be powered by a battery; for example, you could plug a USB power bank into the board. But that's a bulky, expensive and temporary solution. LiPo's are compact and cheap alternatives that come in many shapes and sizes.
Look for boards with built-in charging capabilities and circuit protection. While many LiPo batteries include their own protection circuits, some don’t—so it’s safer to choose a board that has overcharge protection integrated.
Documentation
Always take a moment to evaluate the documentation that comes with a board or module. Is it up to date? Do you understand it? Can you find the information you need easily? Good documentation can make or break a project—especially when you're troubleshooting or working with unfamiliar hardware.
It’s also worth checking if there’s an active community around the product. Are people asking questions? More importantly—are those questions being answered? Is there example code available? Documentation can come in many forms: dedicated websites, wikis, GitHub repositories, or PDFs.
When I first started with electronics, I used a lot of Adafruit products. Their modules are slightly more expensive than similar ones, but the documentation is excellent and well maintained—often in both C and Python. That support saved me countless hours. More recently, I discovered DFRobot, and I’ve been impressed. Their modules are easy to use, well documented, and solidly built.
Onboard programmable LEDs
It might sound silly, but I’ve become a big fan of onboard programmable LEDs. They’re incredibly handy for giving visual feedback—especially in situations where I don’t have access to a serial monitor. Just blinking a LED at startup can quickly confirm that the system has powered on correctly and isn’t running into errors. Normal LEDs connected to various pins on the boards are also sufficient, but an onboard LED simplifies the wiring.
Illustrations by Janneke Schot
Mounting holes
My off grid projects required mounting my boards and modules in waterproof casing. All of a sudden the mounting holes became relevant. Many boards come with either M2 or M3 mounting holes. If you have the option, I highly recommend choosing a board with M3, for two reasons:
- M2 bolts and nuts are tiny, making them really tricky to handle and fasten. Especially in tight spaces. Frustrating.
- M2 bolts and nut are hard to find in stores & online. At least in The Netherlands. M3 is much more common.
Ability to power down power supply pins
This is something I only discovered recently. In my off-grid projects, I’ve started relying heavily on deep sleep mode to conserve battery life. But I noticed that, on many boards, sensors and modules still draw power—even when the board is in deep sleep. This happens because the power supply pins continue to provide voltage, causing unwanted power drain.
Some boards solve this by including a controllable power pin that can be switched off programmatically. For example, the Raspberry Pi Pico has a pin labeled 3.3VEN (pin 13). By setting this pin to LOW, you can cut off power to the 3.3V supply—effectively shutting down connected peripherals during sleep. When the board wakes up, you can simply re-enable the pin to restore power.
If you're working on low-power or battery-powered projects, this feature can make a significant difference in battery life.
Onboard RTC (Real-Time Clock)
If your project requires accurate timestamps—for example, to log sensor data—you’ll need a Real-Time Clock (RTC). Some boards can automatically sync their internal clocks when connected to Wi-Fi, which works great for connected environments. But if you're working off the grid, using LoRa or LoRaWAN without Wi-Fi, you’ll need a dedicated RTC.
Traditionally, RTCs are separate modules with their own coin cell battery to keep time even when the main board is powered off. However, some modern development boards—like the FireBeetle series—come with an RTC built in.
It’s not a critical feature for something like basic home automation, but for logging, remote monitoring, or time-sensitive applications, an onboard RTC is incredibly useful.